Unlock Delta Lakes for PyTorch Training with DeltaTorch
PyTorch has become the deep learning framework of choice in many applications. But managing data loading pipelines for PyTorch can be challenging, especially in a production environment with datasets that may evolve over time. Maintaining and accessing earlier versions of training data can be difficult and costly; concurrent reads and writes can disrupt training jobs; and large datasets can result in significant performance overhead.
DeltaTorch enables PyTorch DataLoaders to seamlessly use Delta tables as a data source. These DataLoaders handle the batching, sampling, and multiprocessing of data during PyTorch training pipelines, without requiring a temporary copy of the Delta tables.
Delta Lake, an open format storage layer that uses the fast Parquet file format along with a transaction log, can mitigate these issues and improve reliability and performance of training data. Delta Lake provides ACID transactions, scalable metadata handling, and unified streaming/batch data processing on top of blob storage like S3 or ADLS. This can provide many advantages to PyTorch users:
- Snapshot isolation ensures concurrent writes do not impact training jobs reading data.
- Full history and rollback allows accessing previous versions of the dataset for model retraining or comparison.
- Performance optimization like data skipping, caching, and predicate pushdown accelerate training.
- Unified batch and streaming ingestion simplifies the data pipeline.
The DeltaTorch library unlocks the benefits of Delta Lake for PyTorch by providing the means to create PyTorch DataLoaders from Delta tables. This post shows how to create a PyTorch DataLoader from the MNIST dataset saved in the Delta Lake format, and how to use the DataLoader to train a simple CNN model (the “hello, world” of deep learning).
Setup
Installing DeltaTorch
You can install DeltaTorch with pip via pip install git+https://github.com/delta-incubator/deltatorch. It requires Python version > 3.8.
Starting a Spark Session
The code snippet below configures a PySpark session with Delta Lake support. We will use this to save/load an example Delta table. Note that some runtime environments, such as Databricks, configure the Spark session for you so you don’t need to do it yourself.
import pyspark
from delta import *

builder = (
    pyspark.sql.SparkSession.builder.appName("deltatorch-example")
    .config("spark.sql.extensions", "io.delta.sql.DeltaSparkSessionExtension")
    .config("spark.sql.catalog.spark_catalog", "org.apache.spark.sql.delta.catalog.DeltaCatalog")
)

spark = configure_spark_with_delta_pip(builder).getOrCreate()
Getting the data and saving it as a Delta table
We download the mnist dataset using torchvision.datasets.MNIST and save it as a Delta table.
There are a couple of things to note in our handling of the data:
- We add a unique id field to the data. This is required as DeltaTorch uses the id field for sharding and parallel data loading.
- We convert the images from PIL Images to numpy arrays and then save them as bytearrays. The DataLoader we define will include logic for converting them to tensors.
from torchvision import datasets
from pyspark.sql.types import IntegerType, StructType, StructField, FloatType, BinaryType
import numpy as np

train_set = datasets.MNIST(root="./data", train=True, download=True)
test_set = datasets.MNIST(root="./data", train=False, download=True)

schema = StructType([
    StructField("id", IntegerType(), False),
    StructField("label", FloatType(), False),
    StructField("features", BinaryType(), False),
])

schema = StructType([
    StructField("id", IntegerType(), False),
    StructField("label", FloatType(), False),
    StructField("features", BinaryType(), False),  # Changed ArrayType(IntegerType()) to BinaryType()
])

# Convert images to numpy arrays and save as binary
train_data = [
    (i, float(y), bytearray(np.array(x))) for i, (x, y) in enumerate(train_set)
]

train_df = spark.createDataFrame(train_data, schema).repartition(50)

test_data = [
    (i, float(y), bytearray(np.array(x))) for i, (x, y) in enumerate(test_set)
]

test_df = spark.createDataFrame(test_data, schema).repartition(50)

# Write the DataFrame to Delta Lake format
train_df.write.format("delta").mode("overwrite").save(
    "./data/mnist_delta/train"
)

test_df.write.format("delta").mode("overwrite").save("./data/mnist_delta/test")
Now that we’ve saved the image data as a Delta table, let’s make sure we can retrieve the images.
# Preview one of the images
import matplotlib.pyplot as plt
import numpy as np

# Read from the delta table
train_df_from_delta = spark.read.format("delta").load(
    "./data/mnist_delta/train"
)

# Preview one of the images
import matplotlib.pyplot as plt
import numpy as np

# Select one row from the DataFrame
row = train_df_from_delta.filter(train_df_from_delta.id == 7).first()

# Extract the image data and label
image_data = row["features"]
label = row["label"]

# Convert the binary data back to a NumPy array and reshape it
image_array = np.frombuffer(image_data, dtype=np.uint8).reshape(28, 28)

# Plot the image
plt.imshow(image_array, cmap="gray")
plt.title(f"Label: {label}")
plt.show()
Which returns:
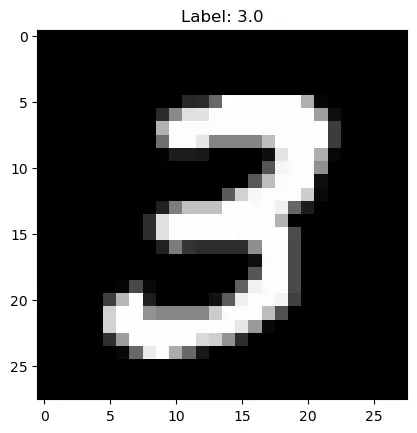
We have no problem retrieving the image array from the Delta table. Now we’re ready to define PyTorch DataLoaders using these Delta tables as data sources.
Defining DataLoaders with DeltaTorch
The DeltaTorch library exposes one key method: deltatorch.create_data_loader. This method allows you to specify the path to the Delta table, the id field, the data fields to load, and various other configuration options.
As mentioned, we need to include some logic for transforming the bytearray representations of the images to tensors. We accomplish this by creating the following callable Python class. We create it in a separate utils.py file so everything works as expected when working with Jupyter notebooks. When using multi-processing with Jupyter notebooks, locally defined classes aren’t serializable. By moving the BinaryToFloatTensor class to a separate file (utils.py), we ensure it can be pickled and thus used in a multi-processing context.
# utils.py
import numpy as np
import torch

class BinaryToFloatTensor(object):

    def __call__(self, pic):
        """
        Convert a byte buffer representation of an image to a float tensor.

        Args:
            pic (bytes): A byte buffer representing an image.

        Returns:
            torch.Tensor: A float tensor representing the image.
        """
        np_array = np.frombuffer(pic, dtype=np.uint8).reshape(28, 28).copy()
        return torch.from_numpy(np_array).float()
Now we can import this class and define the PyTorch DataLoader.
from deltatorch import create_pytorch_dataloader, FieldSpec
from utils import BinaryToFloatTensor

def create_data_loader(path: str, batch_size: int):
    return create_pytorch_dataloader(
        path,
        id_field="id",
        fields=[
            FieldSpec("features", transform=BinaryToFloatTensor()),
            FieldSpec("label"),
        ],
        num_workers=4,
        shuffle=True,
        batch_size=batch_size,
    )
This function takes a path to a Delta table and a batch size and returns a PyTorch DataLoader. We can use it to create a DataLoader from the training data we saved as a Delta table using the following snippet:
train_dl = create_data_loader("./data/mnist_delta/train",
                             batch_size=32)
Which gives us a ready-to-use PyTorch DataLoader:
> type(train_dl)

torch.utils.data.dataloader.DataLoader
Example Training Loop
Now let’s put the DataLoader to work! We’ll train a simple CNN on the MNIST data.
import torch
import torch.nn as nn
import torch.optim as optim
from tqdm import tqdm

# Define the network architecture
class SimpleCNN(nn.Module):
    def __init__(self):
        super(SimpleCNN, self).__init__()
        self.conv1 = nn.Conv2d(1, 32, kernel_size=3, stride=1, padding=1)
        self.relu = nn.ReLU()
        self.maxpool = nn.MaxPool2d(kernel_size=2, stride=2)
        self.fc = nn.Linear(32 * 14 * 14, 10)

    def forward(self, x):
        x = self.conv1(x)
        x = self.relu(x)
        x = self.maxpool(x)
        x = x.view(-1, 32 * 14 * 14) # Flatten the tensor
        x = self.fc(x)
        return x

# Create the network, loss function and optimizer
device = torch.device("cuda" if torch.cuda.is_available() else "cpu")
model = SimpleCNN().to(device)
criterion = nn.CrossEntropyLoss()
optimizer = optim.Adam(model.parameters(), lr=0.001)

# Train the network
for epoch in range(3): # Loop over the dataset multiple times
    correct = 0
    total = 0
    progress = tqdm(enumerate(train_dl), total=len(train_dl))
    for i, data in progress:
        # Get the inputs; data is a list of [inputs, labels]
        inputs, labels = data["features"], data["label"]
        inputs = inputs.unsqueeze(1).to(device) # Add an extra dimension for the single channel (grayscale)
        labels = labels.to(device)
        # Zero the parameter gradients
        optimizer.zero_grad()
        # Forward + backward + optimize
        outputs = model(inputs)
        loss = criterion(outputs, labels.long()) # Use long() to ensure the labels are of the correct type
        loss.backward()
        optimizer.step()
        # Accuracy
        _, predicted = torch.max(outputs.data, 1)
        total += labels.size(0)
        correct += (predicted == labels.long()).sum().item()
        if (i + 1) % 100 == 0: # Print training accuracy every 100 batches
            acc = 100 * correct / total
            progress.set_description(f"Loss: {loss.item():.4f}, Accuracy: {acc:.2f}%")
    print(f"Epoch {epoch + 1}, Loss (Train): {loss.item():.4f}, Accuracy (Train): {acc:.2f}%")
Which returns:
Loss: 0.0001, Accuracy: 94.12%: : 1876it [00:33, 55.81it/s]
Epoch 1, Loss (Train): 0.0693, Accuracy (Train): 94.12%

Loss: 0.0136, Accuracy: 97.40%: : 1876it [00:33, 56.84it/s]
Epoch 2, Loss (Train): 0.0031, Accuracy (Train): 97.40%

Loss: 0.0009, Accuracy: 97.89%: : 1876it [00:33, 55.79it/s]
Epoch 3, Loss (Train): 0.0004, Accuracy (Train): 97.89%
Now we can create a DataLoader from our test data Delta table and check the test accuracy.
test_dl = create_data_loader("./data/mnist_delta/test",
                            batch_size=32)

# Function to calculate accuracy

def calculate_accuracy(y_pred, y_test):
    _, predicted = torch.max(y_pred, 1)
    total = y_test.size(0)
    correct = (predicted == y_test).sum().item()
    return correct / total

model.eval() # Set the model to evaluation mode
total_accuracy = 0
with torch.no_grad(): # We don't need gradients for evaluation
    progress = tqdm(enumerate(test_dl), total=len(test_dl))
    for i, data in progress:
        inputs, labels = data["features"], data["label"]
        inputs = inputs.unsqueeze(1).to(device) # Add an extra dimension for the single channel (grayscale)
        labels = labels.to(device)
        # Forward pass
        outputs = model(inputs)
        # Calculate accuracy
        acc = calculate_accuracy(outputs, labels.long()) # Use long() to ensure the labels are of the correct type
        total_accuracy += acc
        # progress.set_description(f"Accuracy: {acc*100:.2f}%")
    # Calculate average accuracy over the entire test set
    average_accuracy = total_accuracy / len(test_dl)
    print(f"Average test accuracy: {average_accuracy*100:.2f}%")
Which returns
Average test accuracy: 97.32%Conclusion
This post has shown how to create a PyTorch Dataloader with a Delta table source using the DeltaTorch library. Delta Lake’s reliability features such as ACID transactions and versioning, along with performance optimizations such as Z-ordering and data skipping, offer a significant improvement over other data formats used for training deep learning models. Whether you are a long-time Delta Lake user or you’re interested in exploring the benefits of Delta Lake for the first time in your next Deep Learning project, you can follow the example in this post to get started with DeltaTorch.
For more resources, check out the project’s GitHub repository. In particular, take a look at the examples directory for examples of how to use DeltaTorch in different types of PyTorch projects. Also, check out Michael Shtelma’s presentation from the 2023 Data and AI Summit, Scaling Deep Learning Using Delta Lake Storage Format on Databricks.
You can find all of the code from this post here.